4.2.2: Circle Ci
Learning Objectives
Understand what CircleCI is capable and how it can help speed up deployment and development
Understand how CircleCI links with a Github branch and Netlify project
Implement a flow where, a push to Github will lead to Netlify re deploying our application
Implement CircleCI for CI and CD
Introduction
CircleCI is a platform to implement CI (continuous integration) and can be integrated with Netlify to provide CD (continuous delivery), CircleCI provides an automated and streamlined workflow to build, test as well as deploy applications. This platform, CircleCI exists as a cloud-based service that integrates to well known version control systems such as Github and Bitbucket. CircleCI supports a plethora of languages as well as frameworks meaning many developers, companies and corporations use this tool.
Lets discuss some benefits of CircleCI:
Make builds and test automated:
When using CircleCI you can automatically trigger builds and tests on your code repositories every time you are pushing and altering code on a Github branch. This is helpful to ensure your code is executing as expected and ensures no incomplete version that fails tests is built or deployed.
Customise you workflow:
You are able to develop custom workflows using CircleCi to specify the required instructions and commands to build, test as well as deploy your application. Using this tool we are able to configure environmental variables, target deployments and more.
Integratable:
CircleCI was created with integration in mind, it has an abundance of services and tools that could be used in your workflow. This includes many cloud providers such as AWS and Netlify, testing tools like Jest, Mocha and Chai, and code formatters like ESlint.
Scaleable and Secure:
It has parallel testing along with distributed builds intended to speed up the development cycle. Moreover CircleCI provides secure features like SSH access, environmental/ secret management as well as checking compliance certifications such as SOC 2.
Analytics:
This platform produces detailed insights into your applications, builds, test results and deployment, allowing developers to track performance, identify errors and improve the work flow.
Setup
In order to demonstrate the how useful CircleCI is a helpful tool, we will deploy a Firebase application to Netlify, we will setup a system such that when we push to GitHub CircleCI will trigger an workflow to build the latest code and update our deployed site. Please fork and clone this repository, you will need to supply your own Firebase credentials and Applications details, you can use the Firebase Application you created for M2 Instagram Bootcamp.
You need to follow the steps below to setup the application before you can start to setup CircleCI, Netlify and our deployment workflow.
Once you have cloned the repository onto your local machine install all of the dependencies with the command, run the command in the root of the project directory
Alter the sample.env
You will then need to alter the sample.env and add in your own credentials. This will require you to have a Firebase Application that has these Firebase tools, RealTimeDatabase, Storage and Auth.
Following this you will be able to run the React Application by running the command below within the root of the project directory.
Check to see if you're able to get the posts saved in your Firebase RealTimeDatabase. Here is a sample of how it may look, I have added some fruit images online, here you can see an apple. Your image will be whatever you added during M2 Instagram Bootcamp.
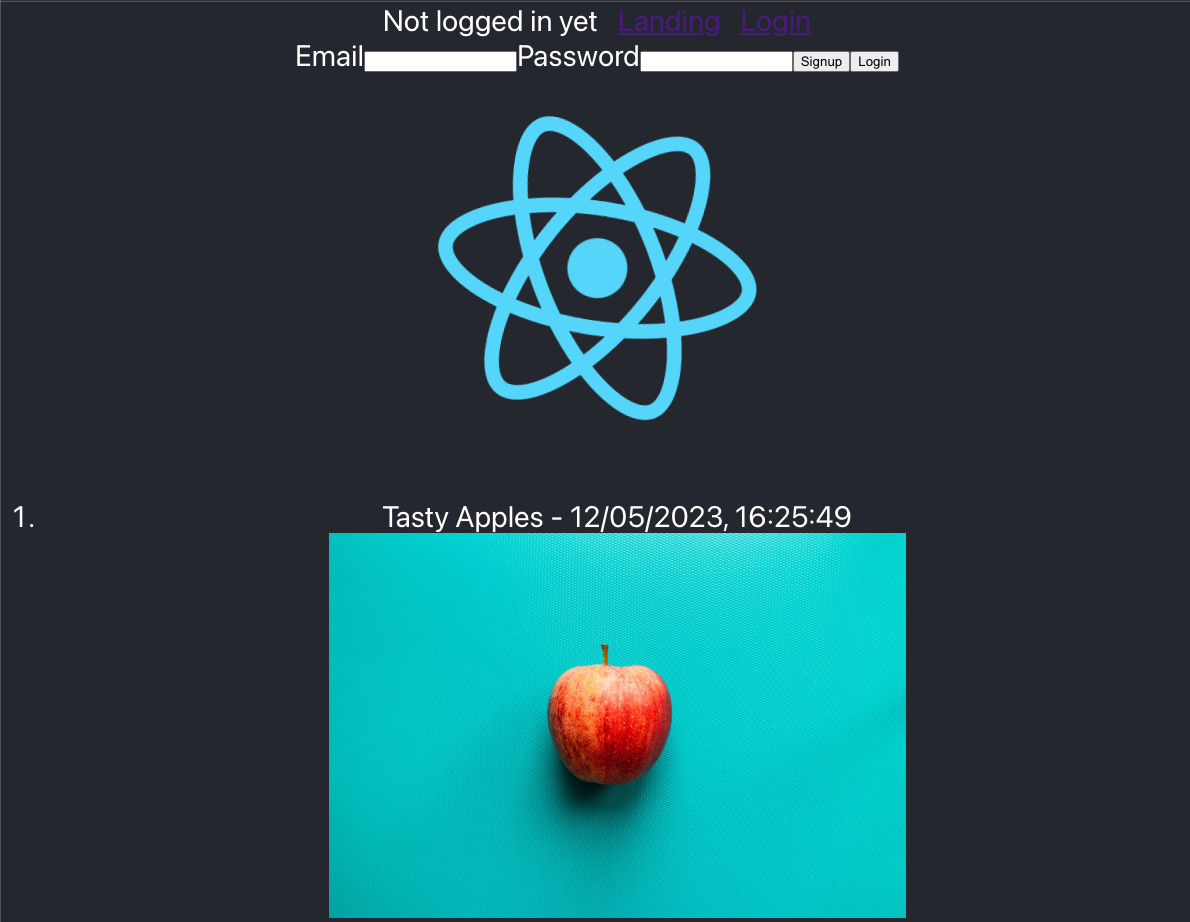
If you cannot see your posts appear you may need to alter these variables within the cloned and forked application:
Once you've ensured you can get your data we can continue to the next step.
Netlify Deployment
The cloned application already includes netlify-cli, but if you're applying these steps onto your own project you will need to install the package, run this command in the root of the project directory:
You need to make sure your current code is on GitHub, if you've forked and cloned, then it is but if you're applying this to your application make sure its online.
At this point we can create a new branch, we can name it, netlify-ignored-deployment, or whatever name you would like. Push this branch online. The naming convention of the branch may lead you to wonder why we need it. Netlify tracks a projects branch to trigger application deployment and we want to ensure that we do not run two deployment processes simultaneously. To prevent this we make Netlify track this dummy branch.
We will not be pushing changes to this branch.
Online Application
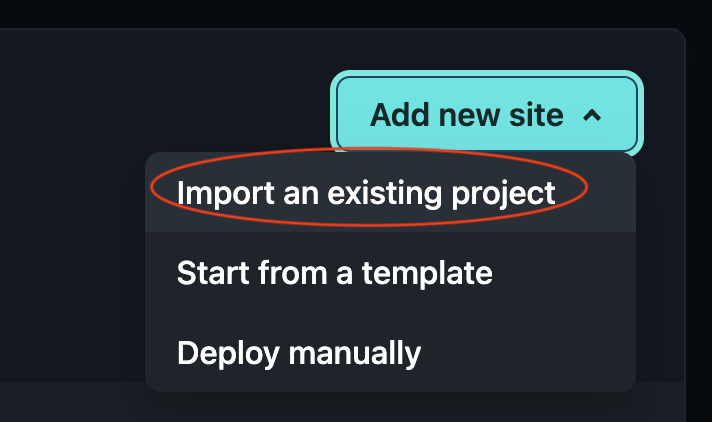
To deploy an application on Netlify you must goto the Netlify App online and login, click into the Sites tab and click on Add new site:

Click on Import an existing project:
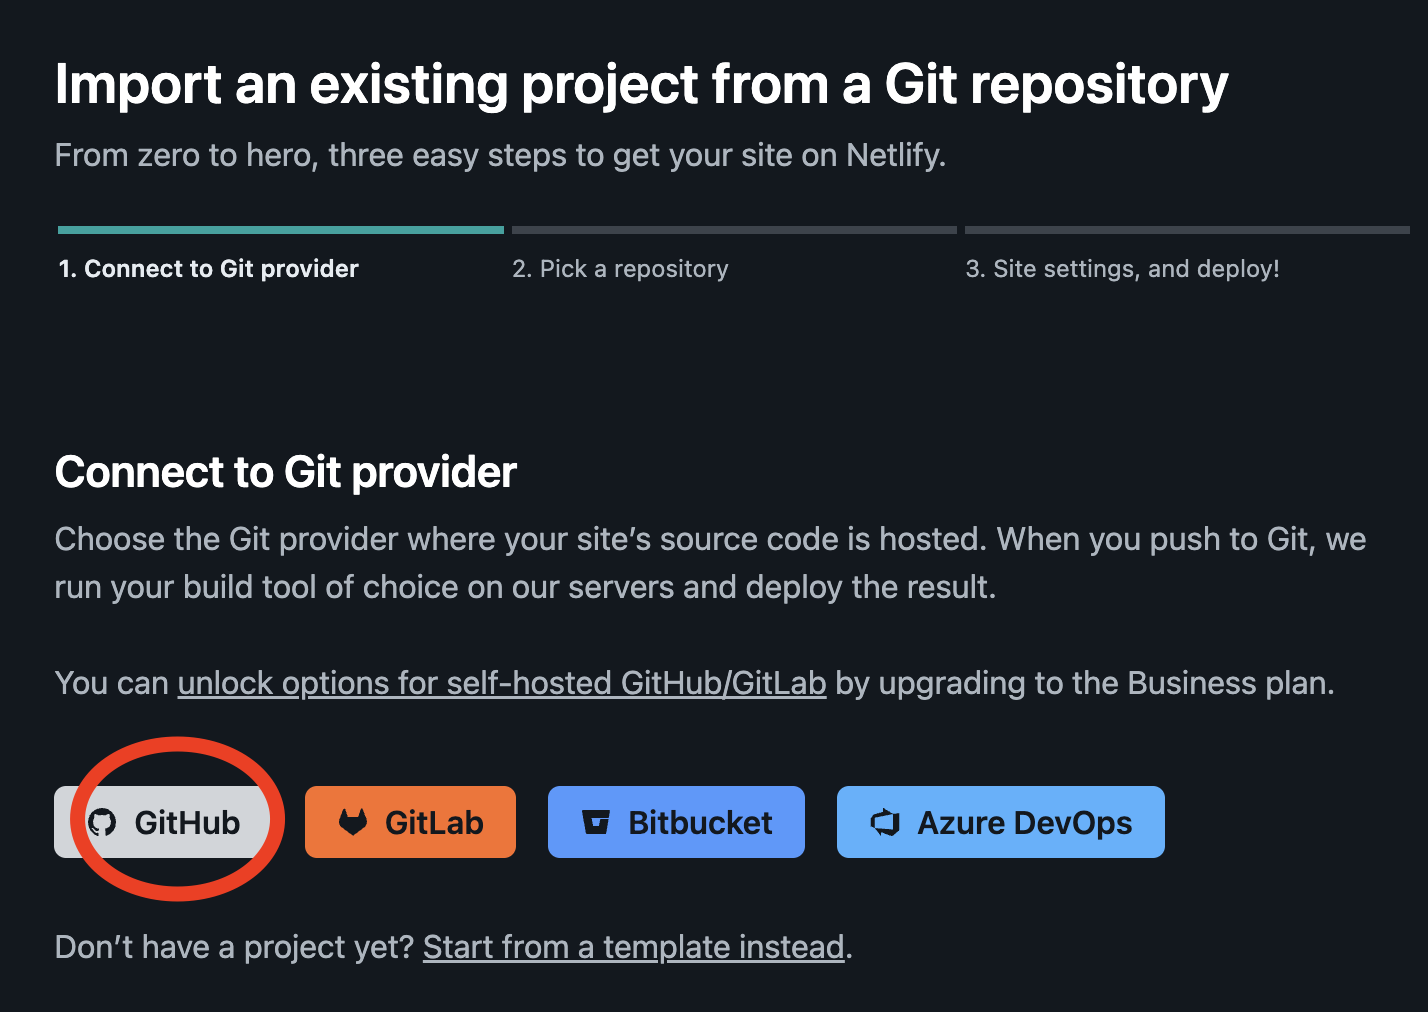
Choose GitHub as the provider:
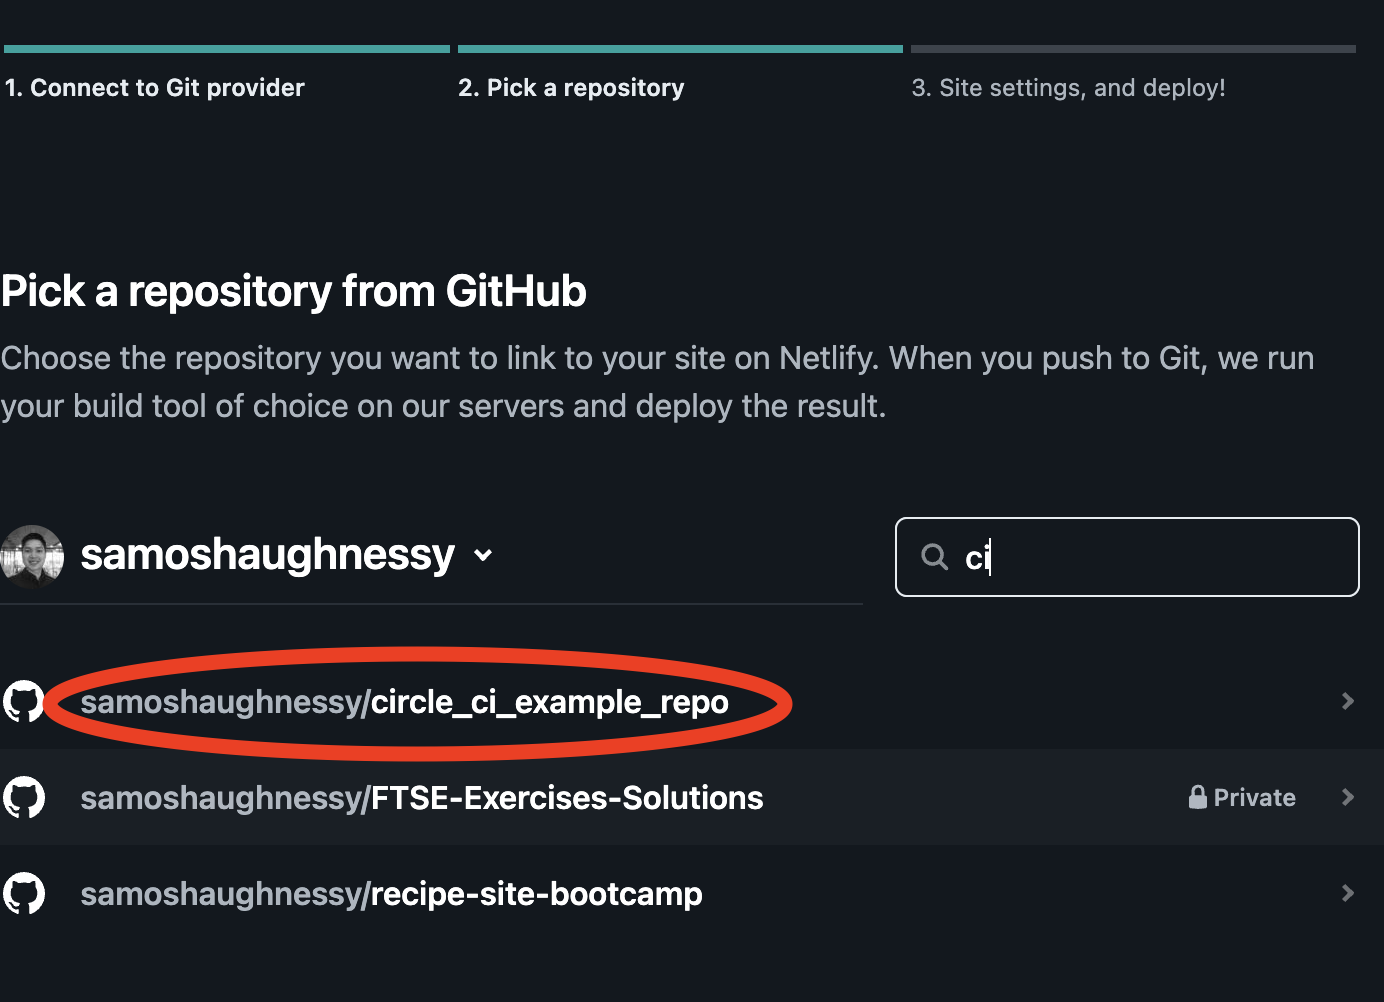
Select the project that you want Netlify to track, it should be your forked repo:
Now add in the branch that Netlify should track and deploy from, I am going to target netlify-ignored-deployment:
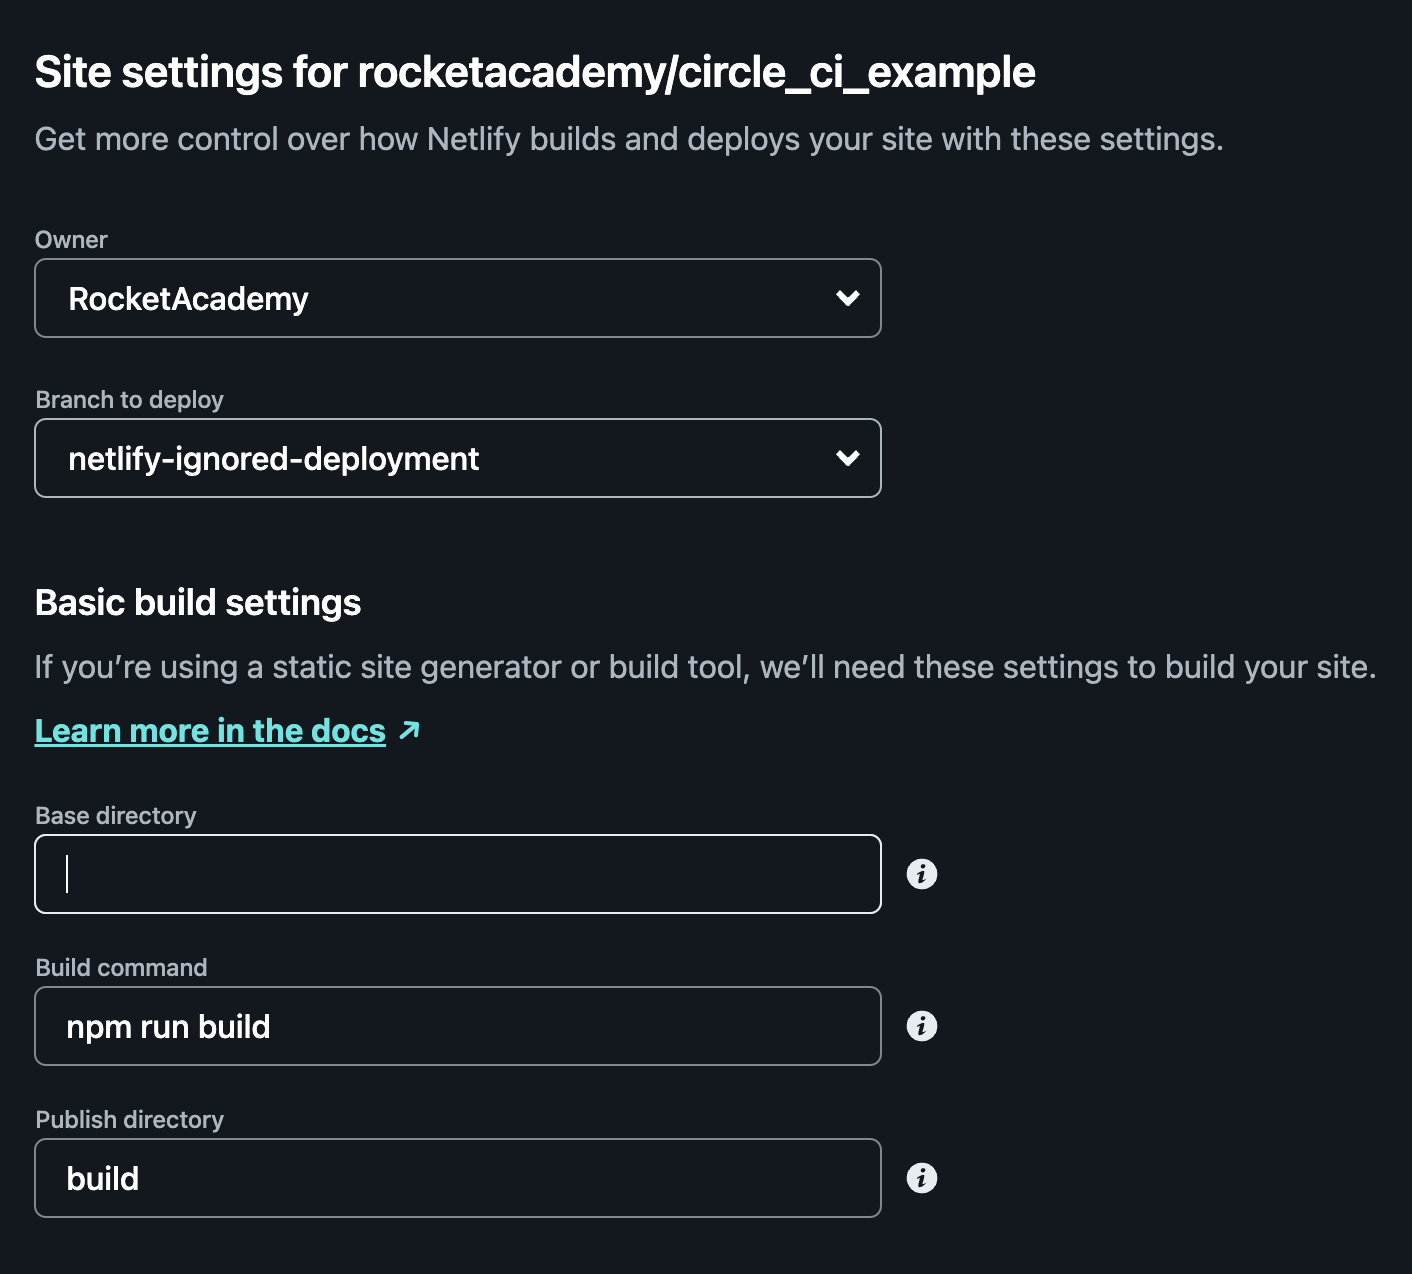
After this you can click on the Deploy site option.
This will trigger your repository to be deployed with Netlify, you should be able to see the site on a url that looks like: sitename.netlify.app
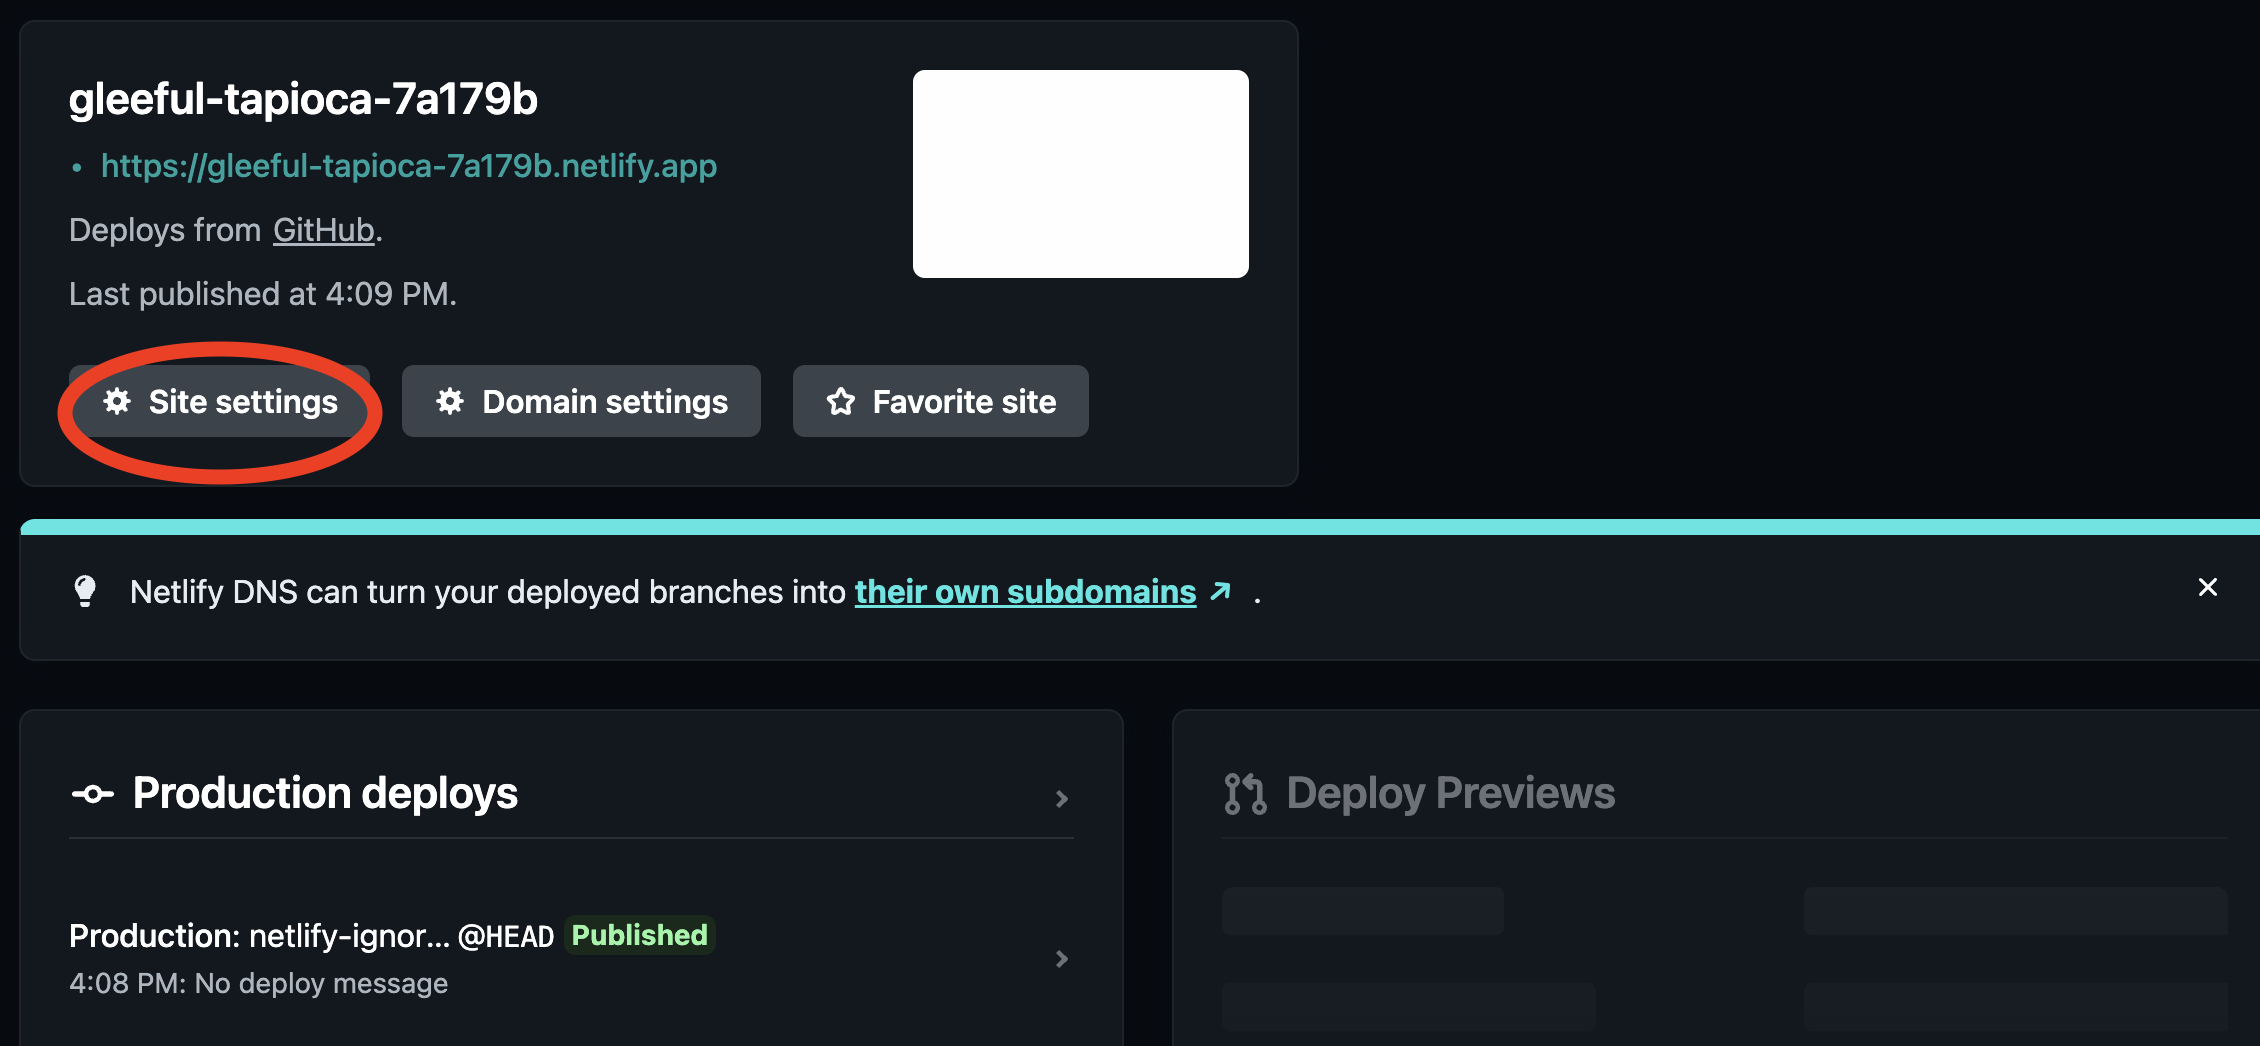
At this point your application is probably erroring this is because you need to set up the Environmental variables that are in our application. To do this goto your Netlify application dashboard, select Site settings:
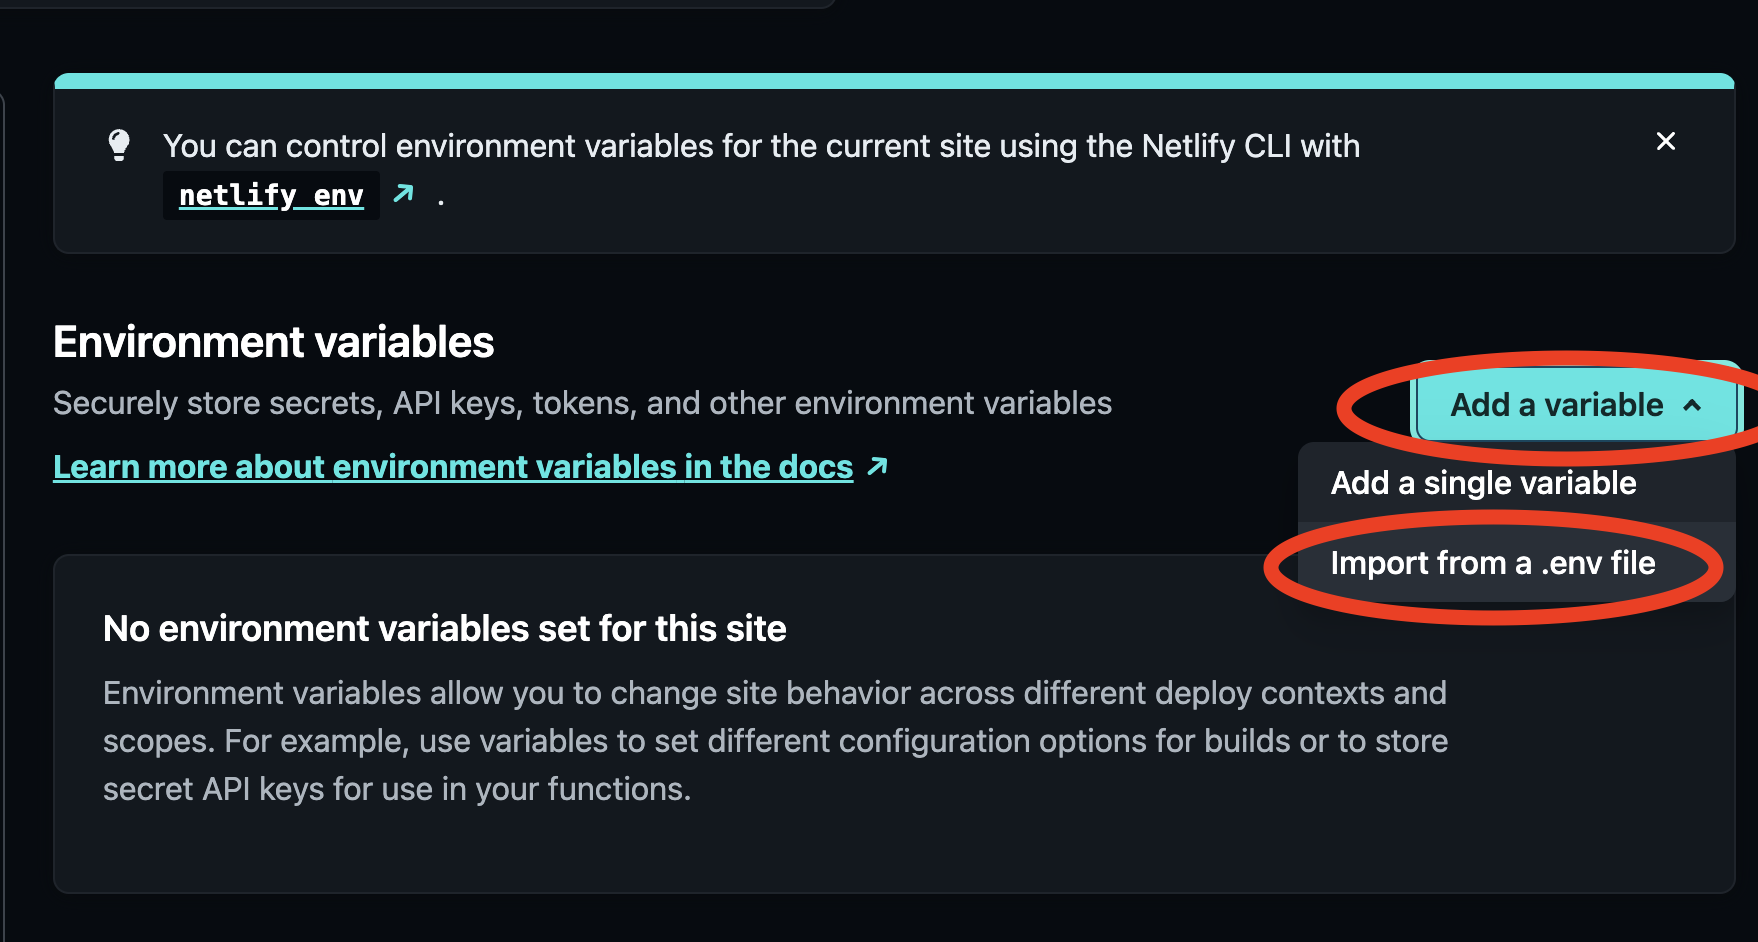
Then click on the Environment Variables tab, and the Add a variable button, on the dropdown click on Import from a .env file:
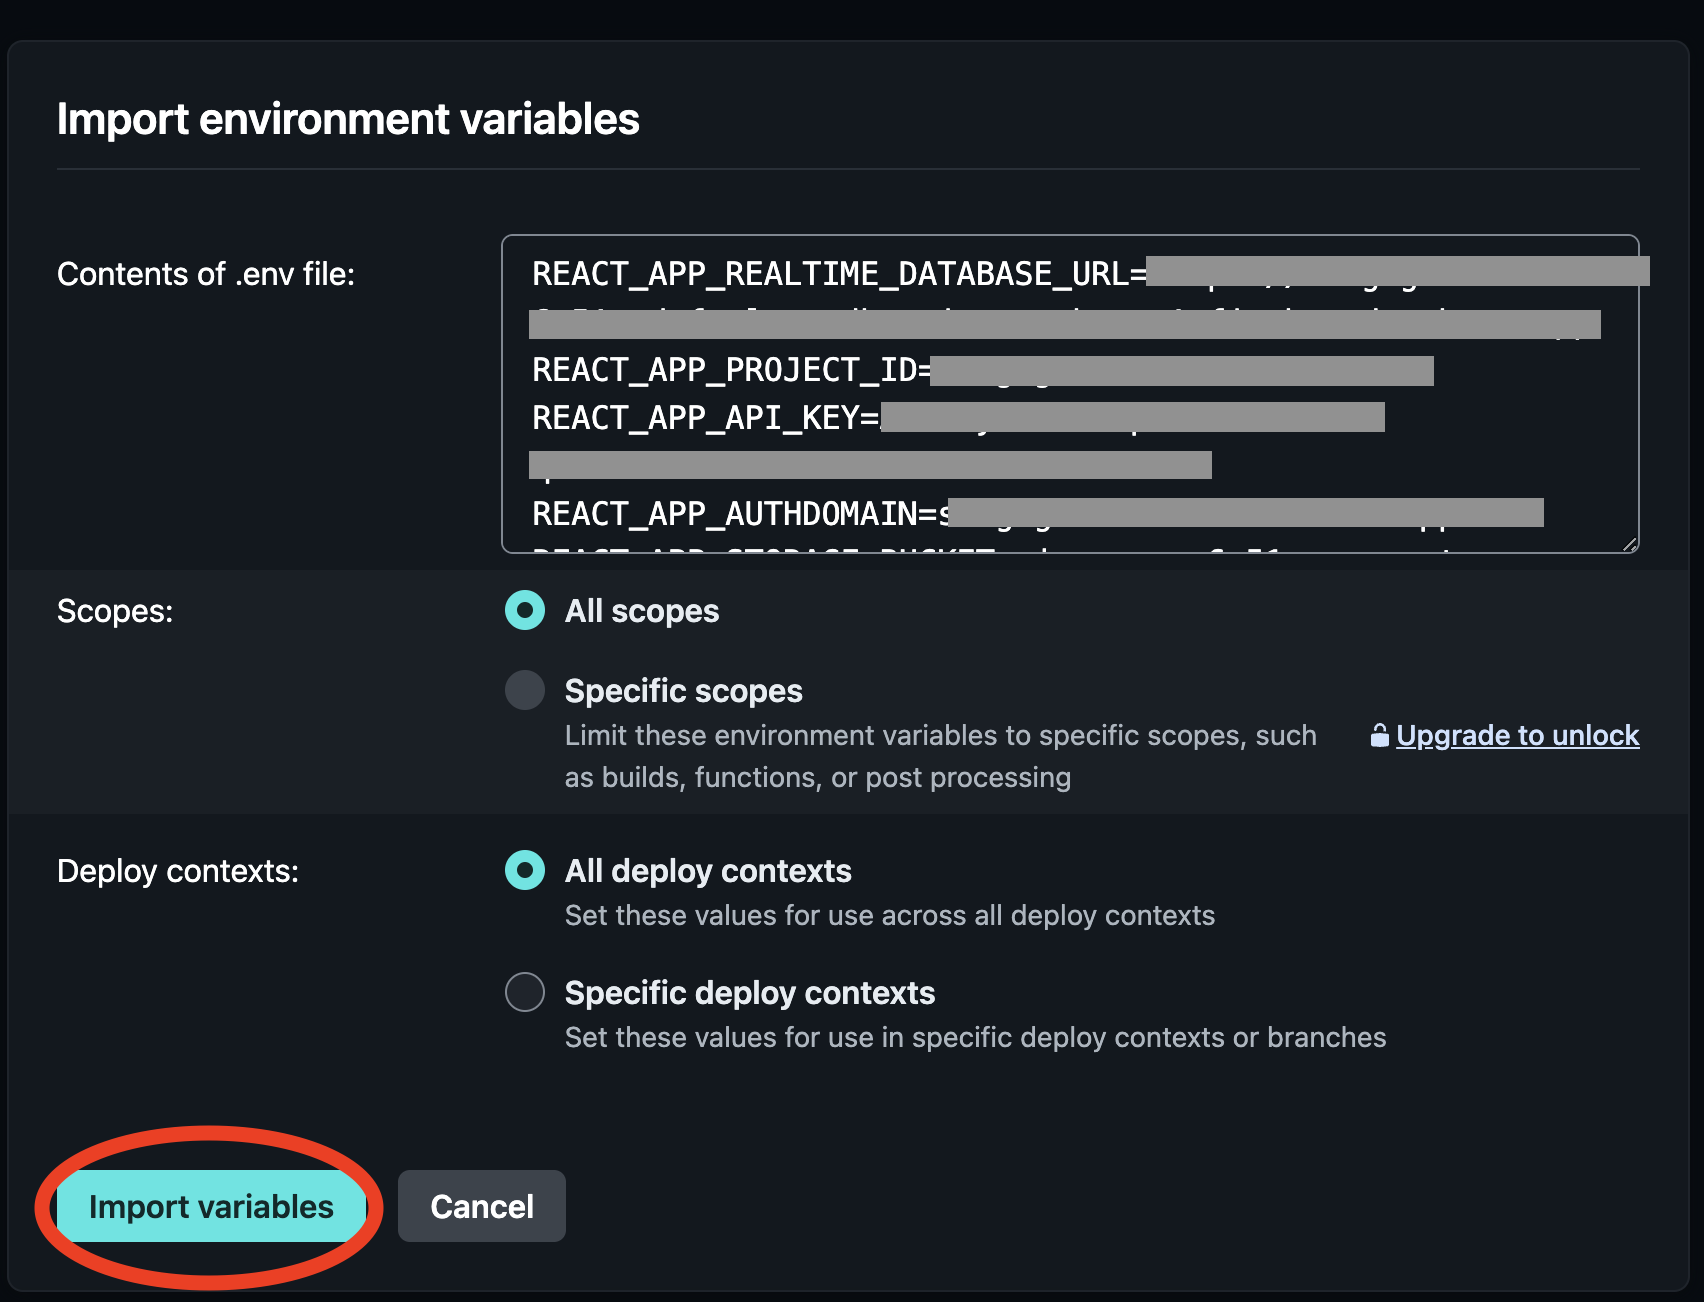
At this point copy the .env that you created to test out the React App. Once you've placed in all of your enviromental variables click on Import variables.
At this point click back onto the Deploystab, select the current project, click on the Trigger deploy button, and then click on Deploy site. At this stage you should be able to goto your deployed website and it should replicate your version running on localhost as its accessing the same Firebase RealTimeDatabase.
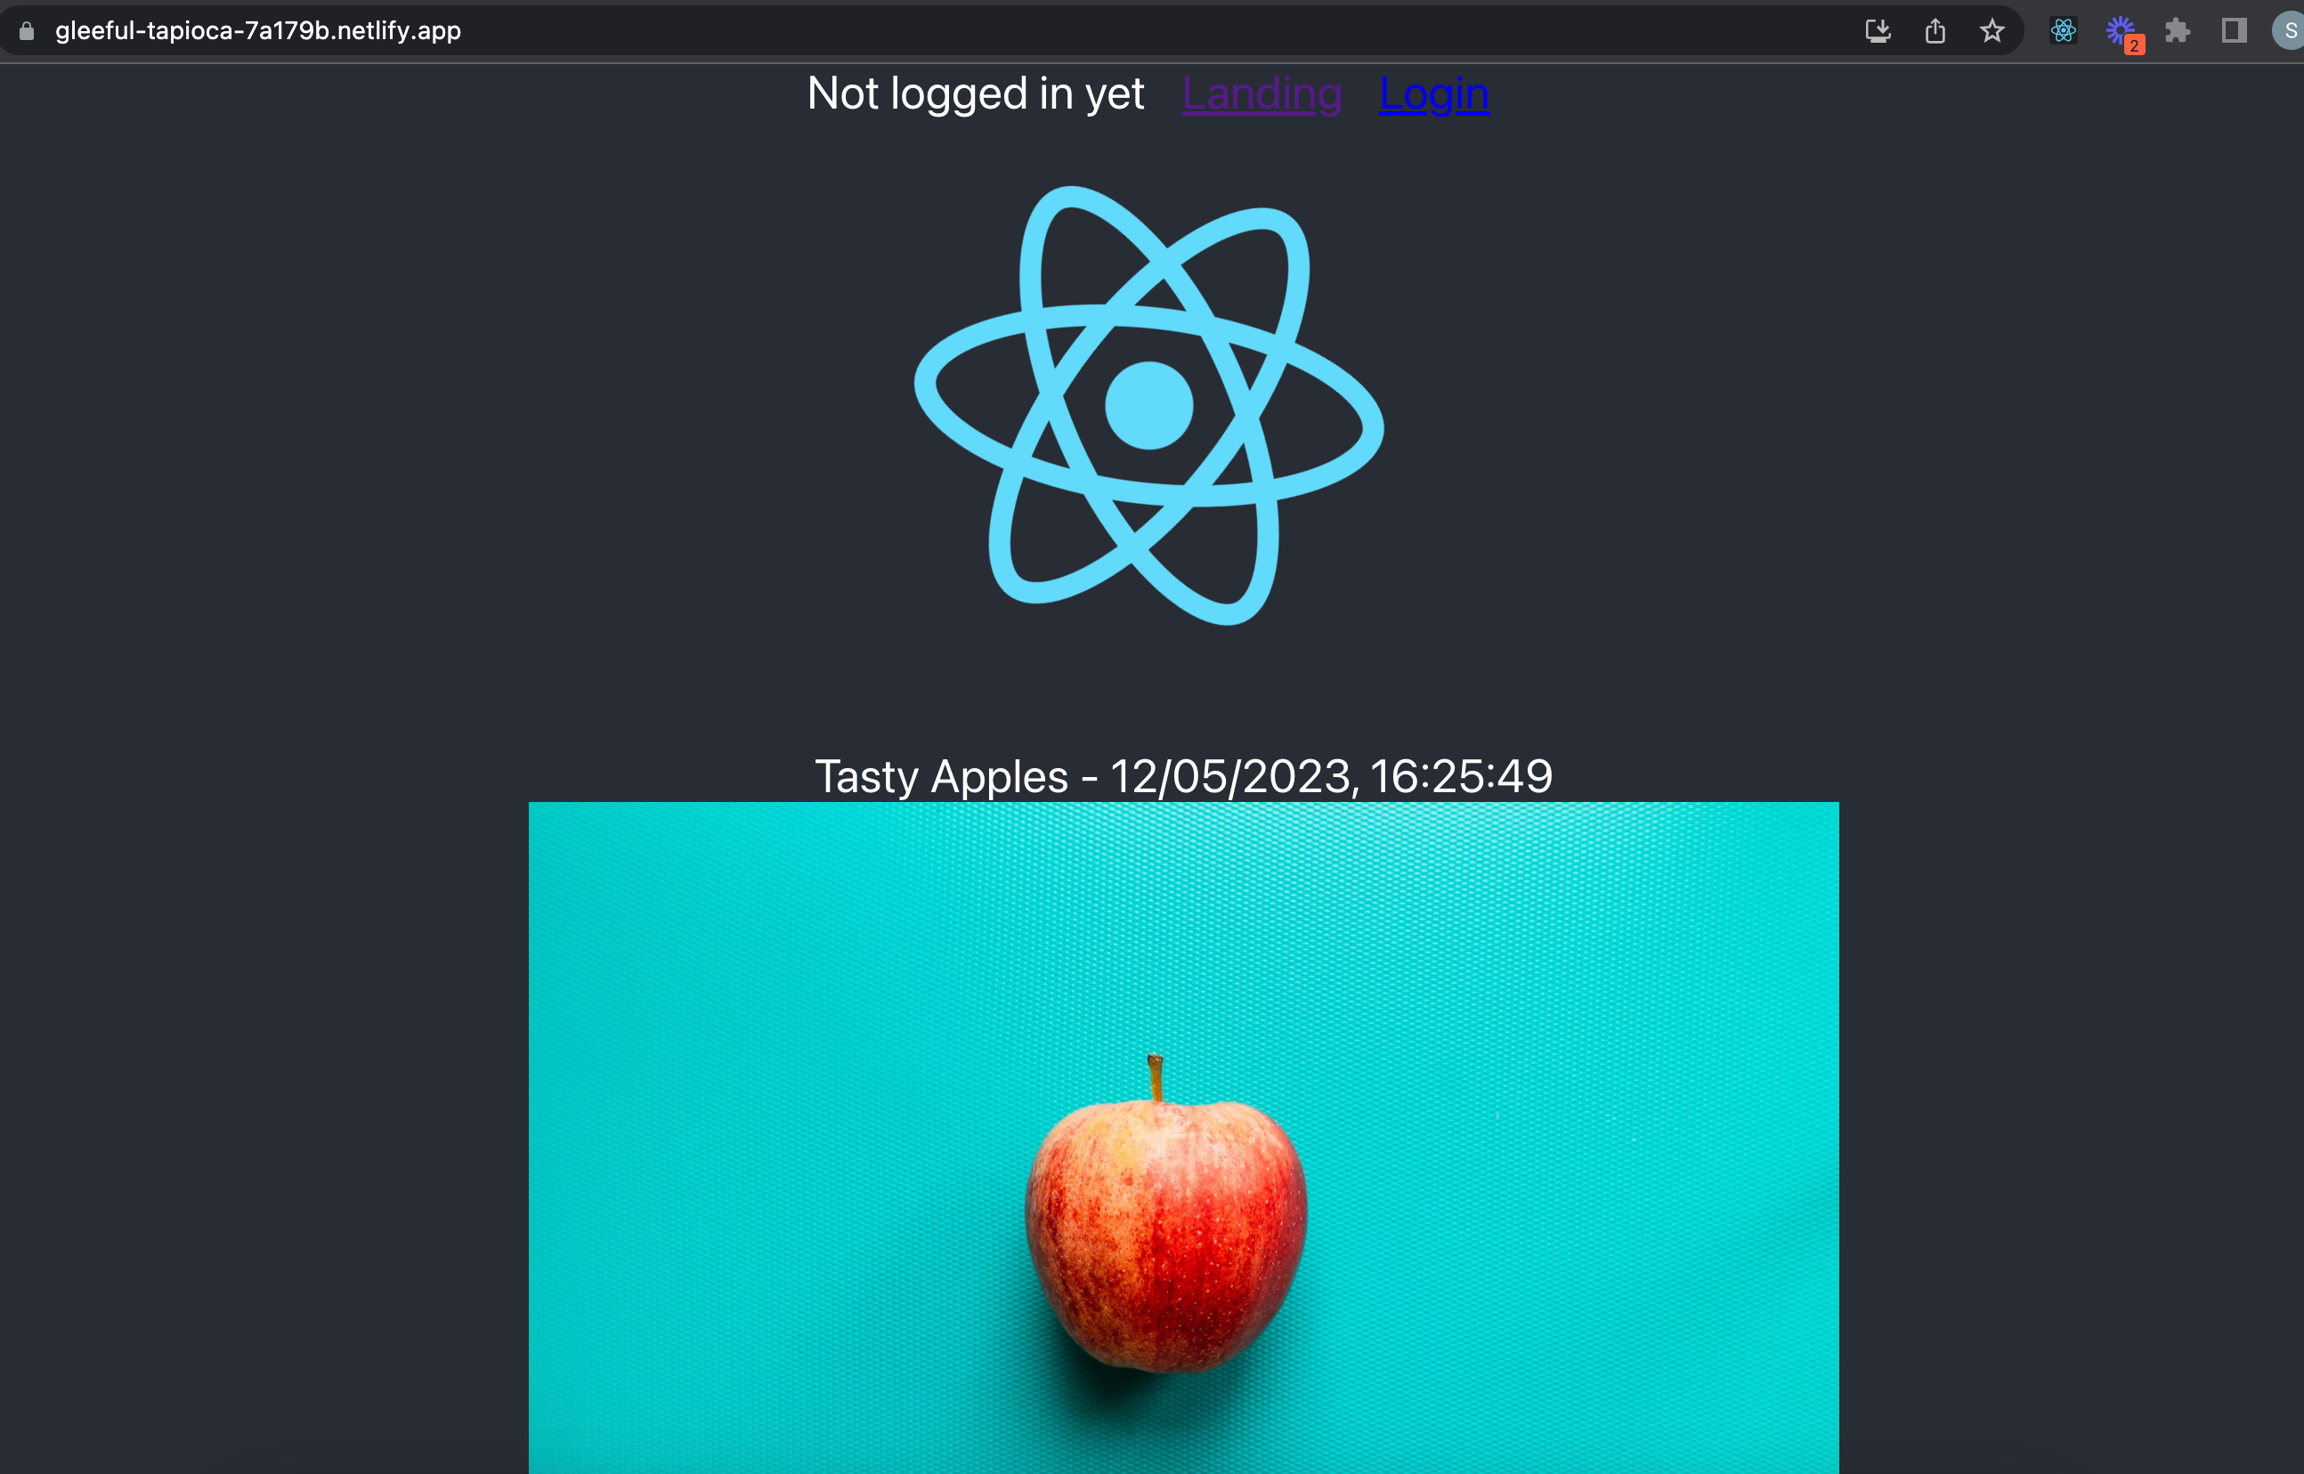
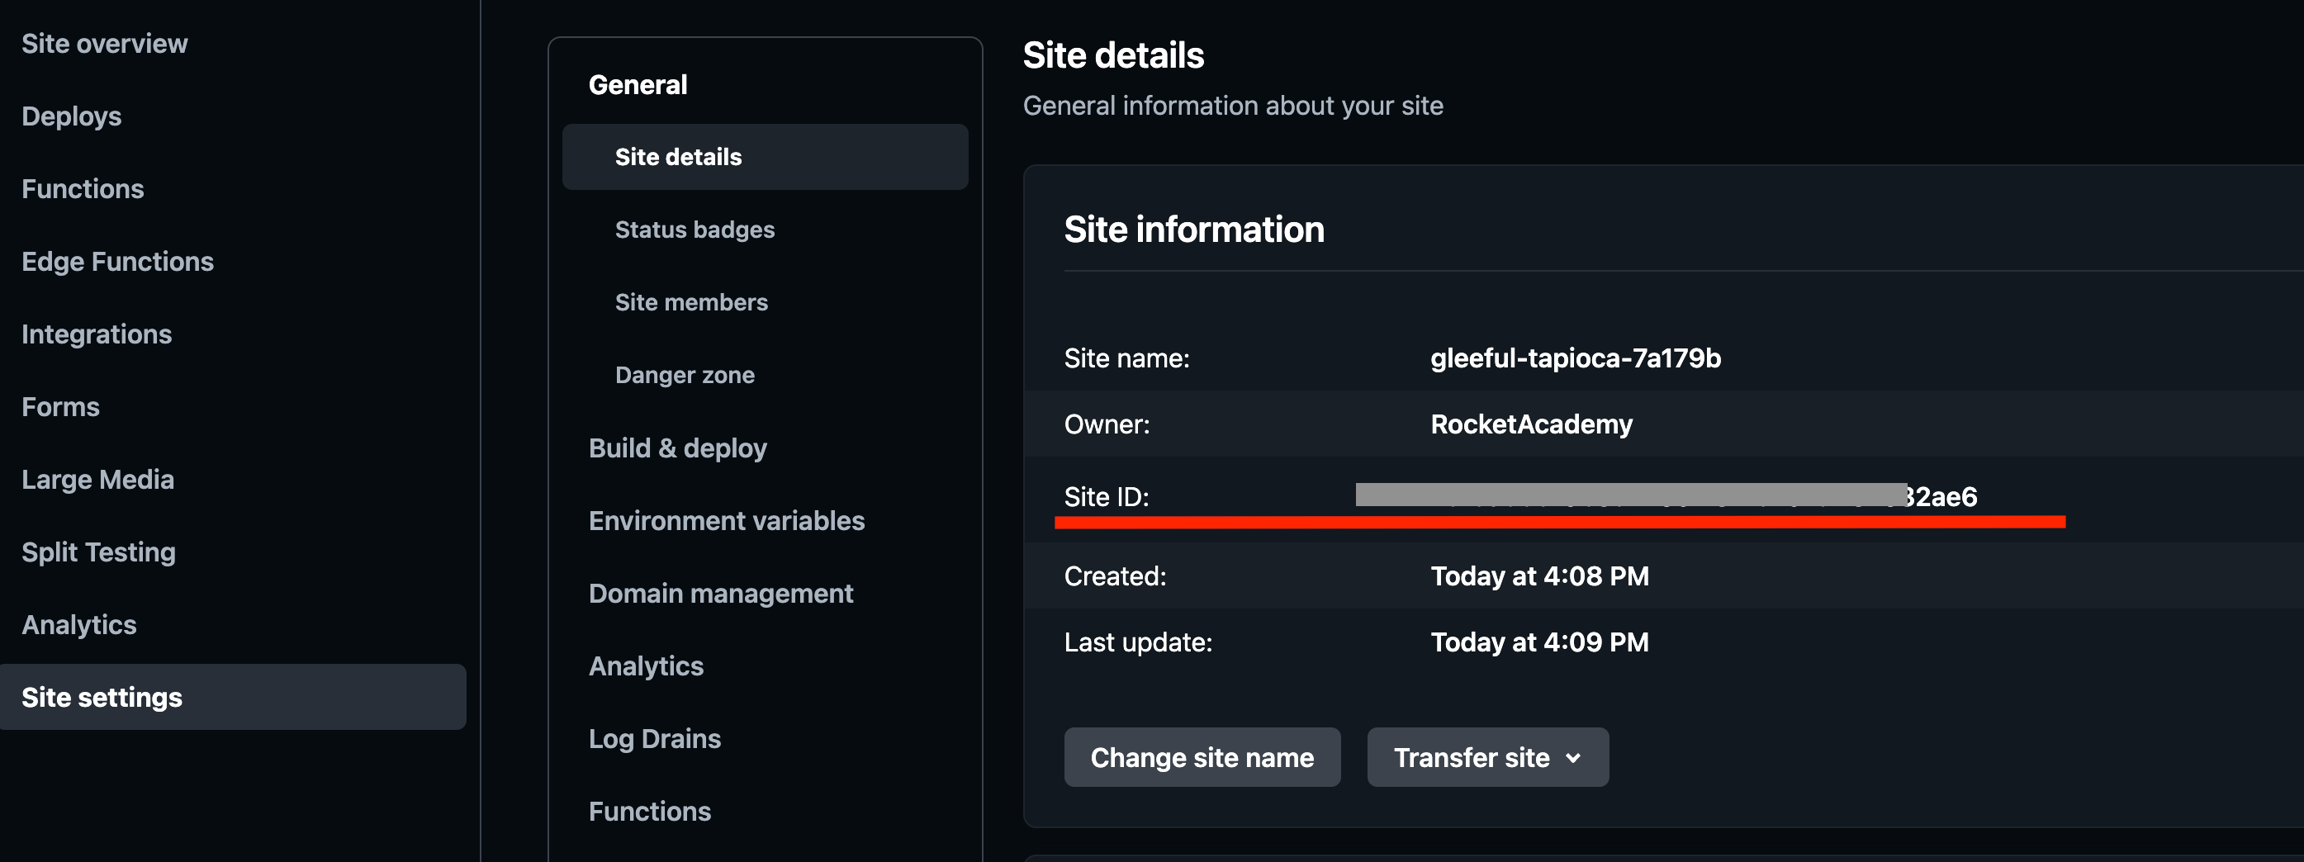
Now that we have successfully deployed our React-Firebase Application on Netlify we will need some credentials from Netlify so that we can preform automated deployment from our CircleCI workflow. You are going to need the APP ID as well as the Personal Access token from Netlify.
Please save these values so you can access them later.
You can retrieve the APP ID from your Netlify Applications dashboard, Site settings, Site details:
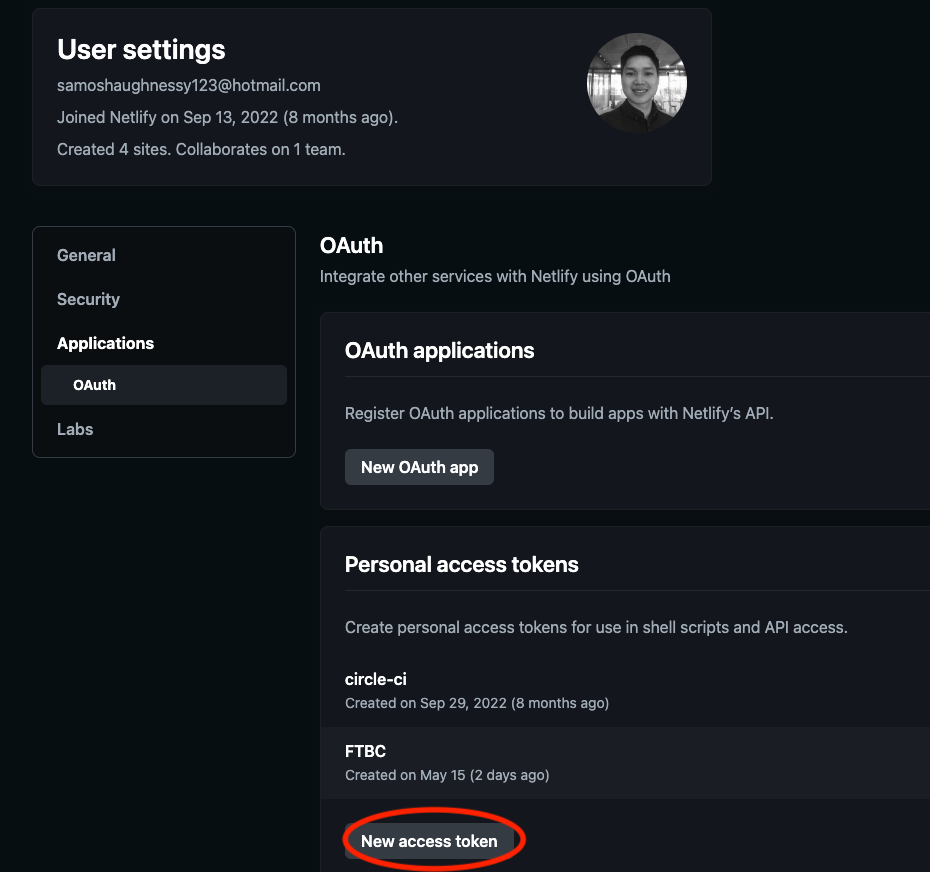
To get the Personal Access token, click on your profile picture and then go into User settings.

From here click on the Applications tab, navigate to the Personal access tokens section and click on New access token. Make sure you save the access token as you wont be able to access it later.
CircleCI
While we can deploy our application through Netlify, we would be unable to run tests on our application, to make testing possible, we can hand deployment over to CircleCI. Using this tool we will build and deploy our Application using the Netlify domain, it should be noted we will need to setup CircleCI with the same environment variables that we made for Netlify.
Now that we have ensured that we have a working version of our repository on Netlify, we can begin to setup this application on CircleCI. The first step that we need to do is change the branch back to the main branch. Then we can add a .circleci directory into the root of the project folder structure. Inside here we will generate a config.yml file, this file will contain our configuration and workflow.
Please populate the config.yml file with the configuration below:
You can push this new directory and file to the main branch on GitHub. We will discuss this configuration later on in the walk through.
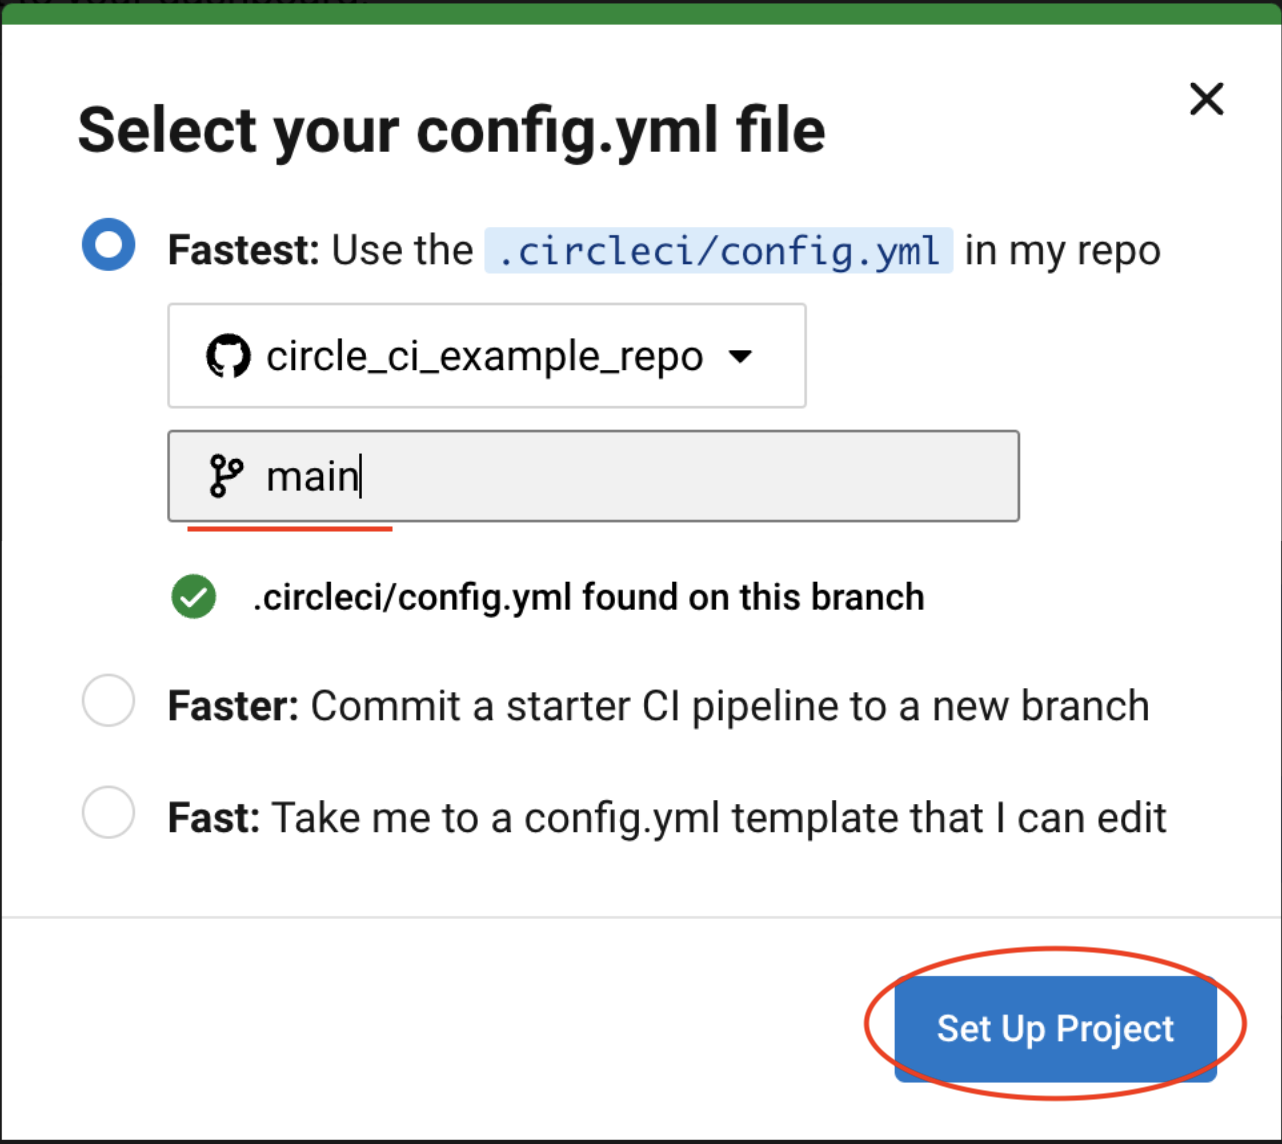
Next, navigate to the CircleCI application online, if you've not created an account please do so now and link it to your GitHub repositories. Once this is complete, click on the Projects tab, we are then able to see a list of all connected repo that we can deploy using Netlify. Choose the repo you wish to deploy and click Set Up Project:
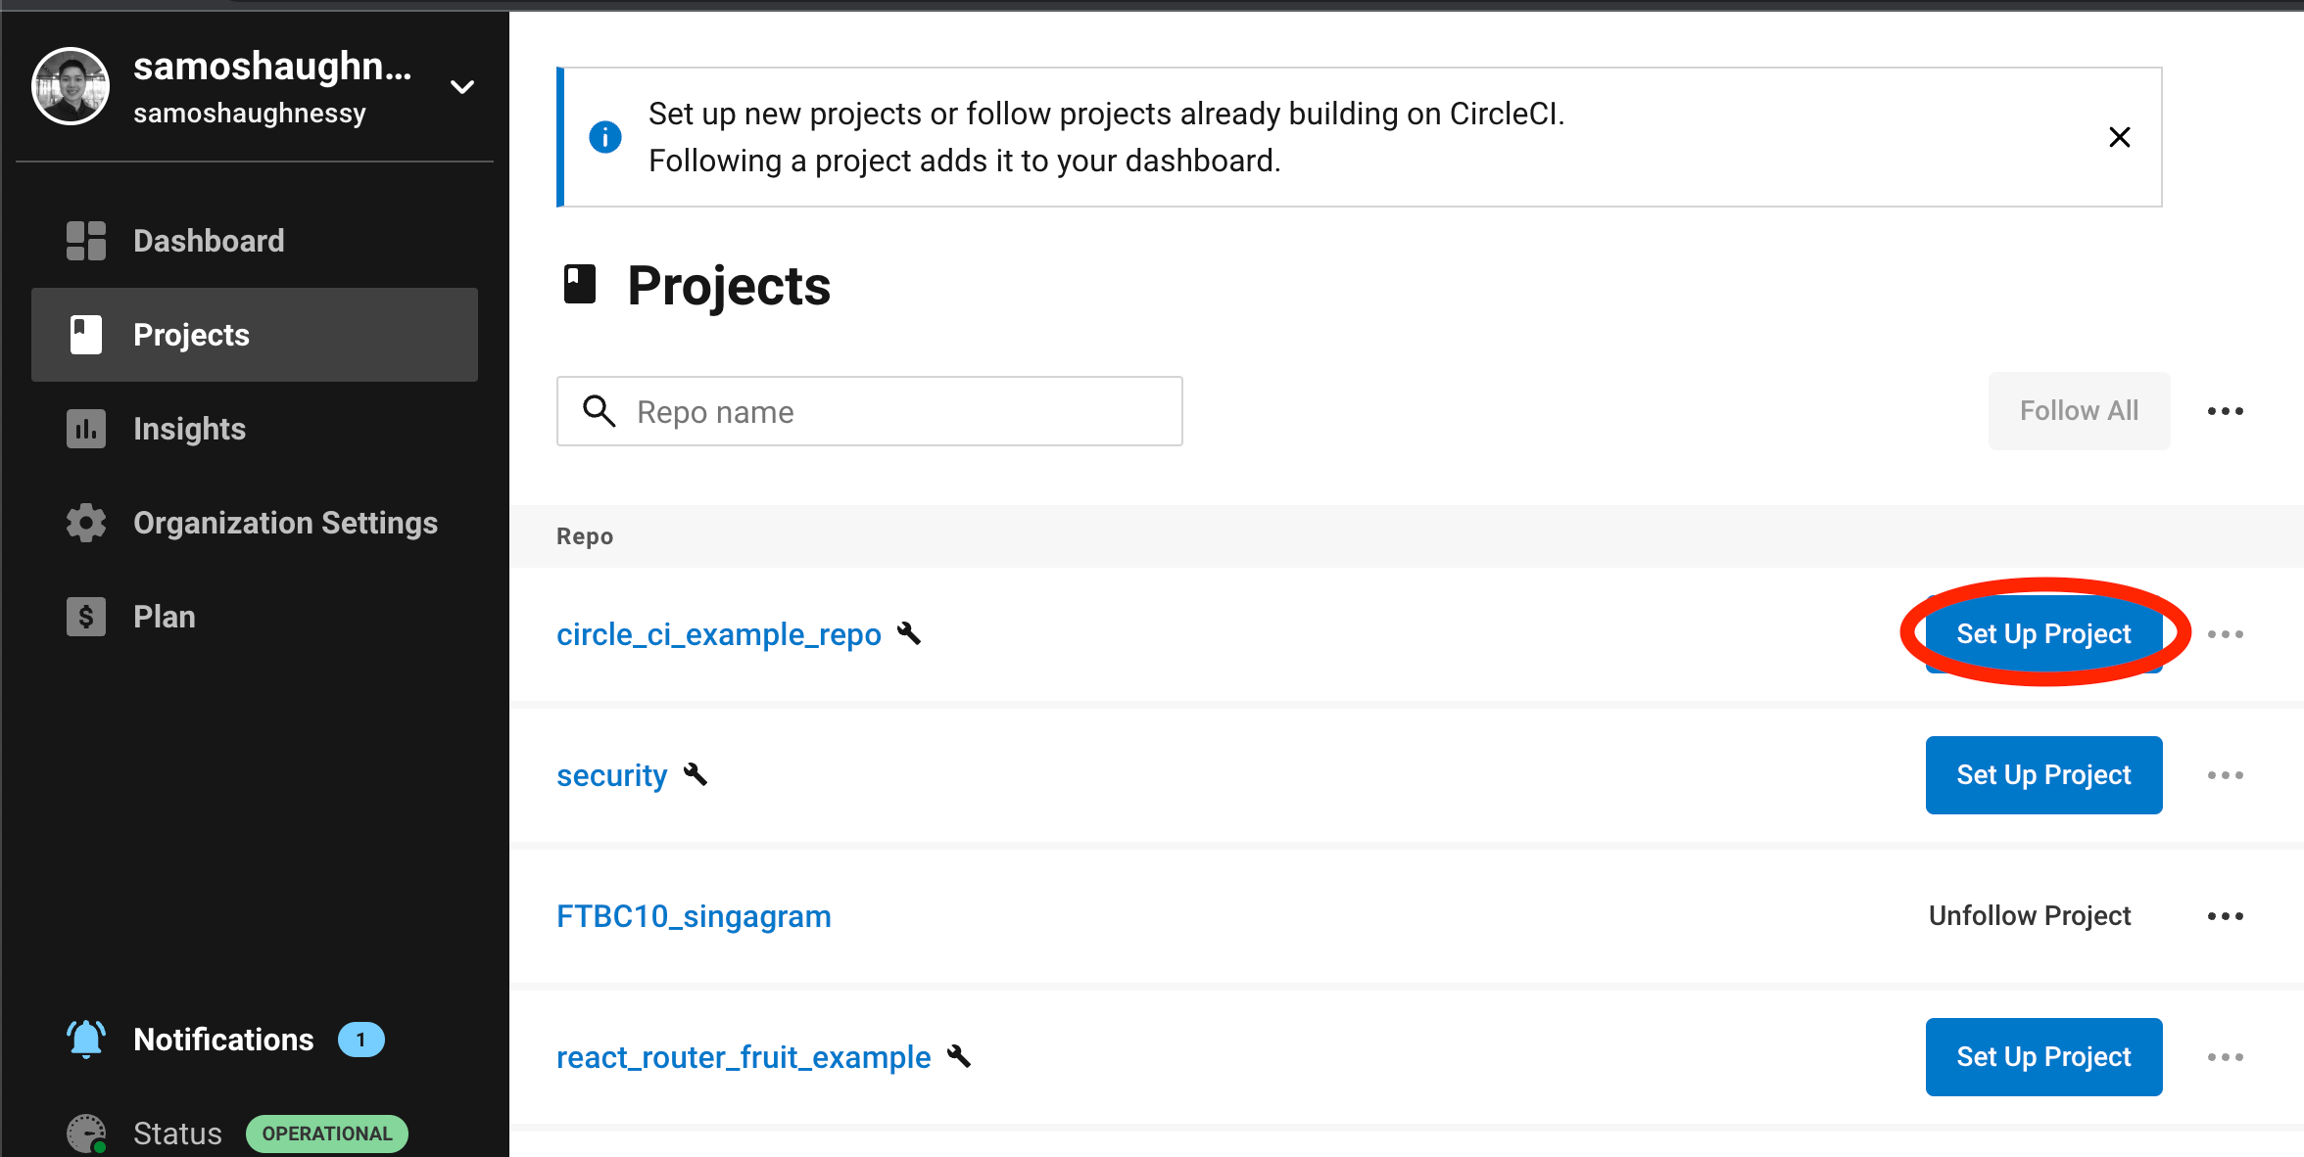
Select the main branch
This will start a build that will ultimately fail, this is because we have yet to add in the Netlify credentials that we saved previously. To do this we will need to populate this projects Environmental Variables, click on the three dots and to Project Settings:

Add in the APP_ID and PERSONAL_ACCESS_TOKEN that we retrieved from Netlify name them:
NETLIFY_SITE_ID and NETLIFY_ACCESS_TOKEN respectively. These environmental variables are required such that CircleCI can trigger deployments through Netlify. In addition to these you will also need to create and store all the credentials in your .env that you pasted in the Netlify project to connect Firebase.
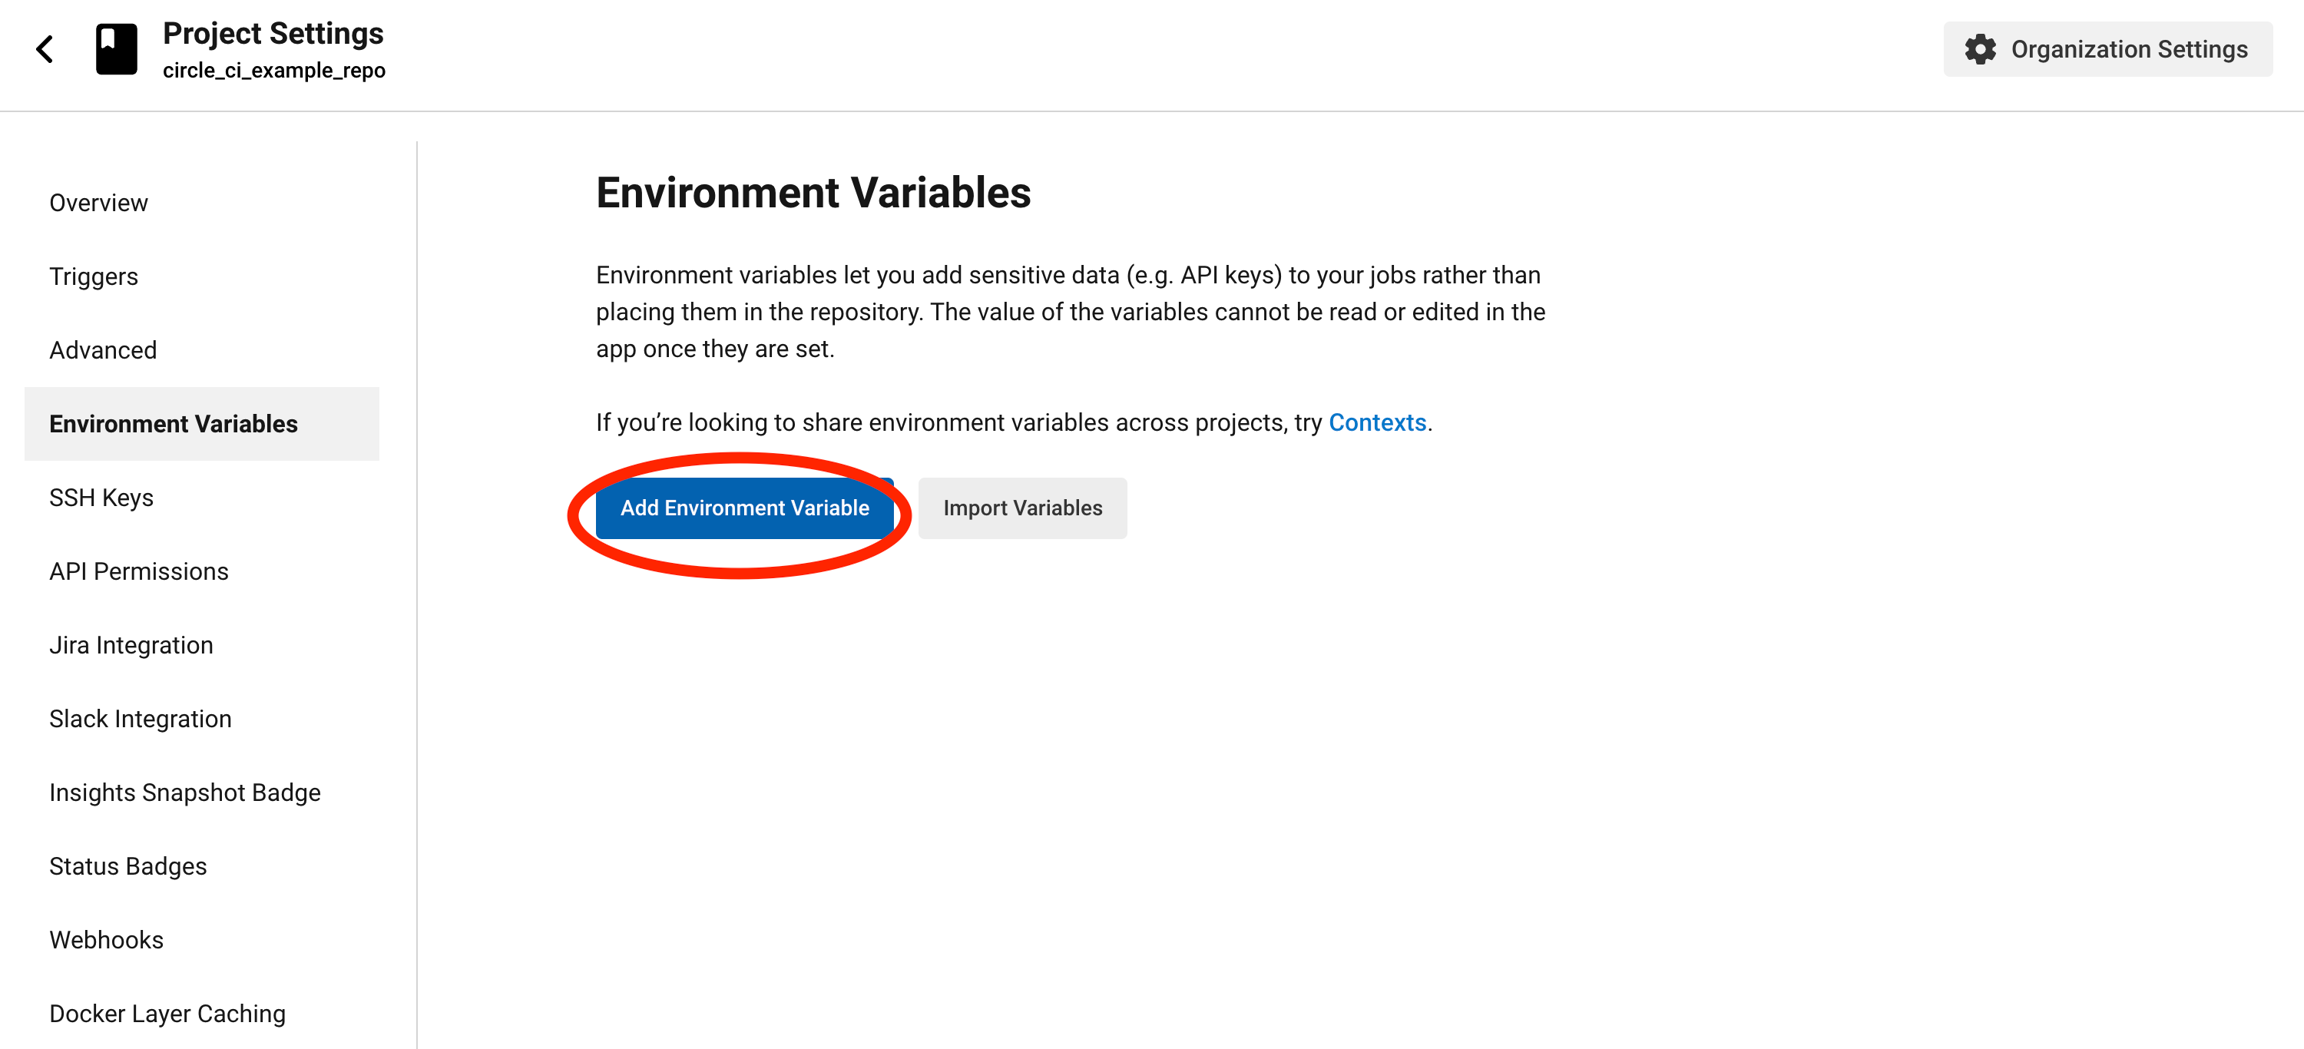
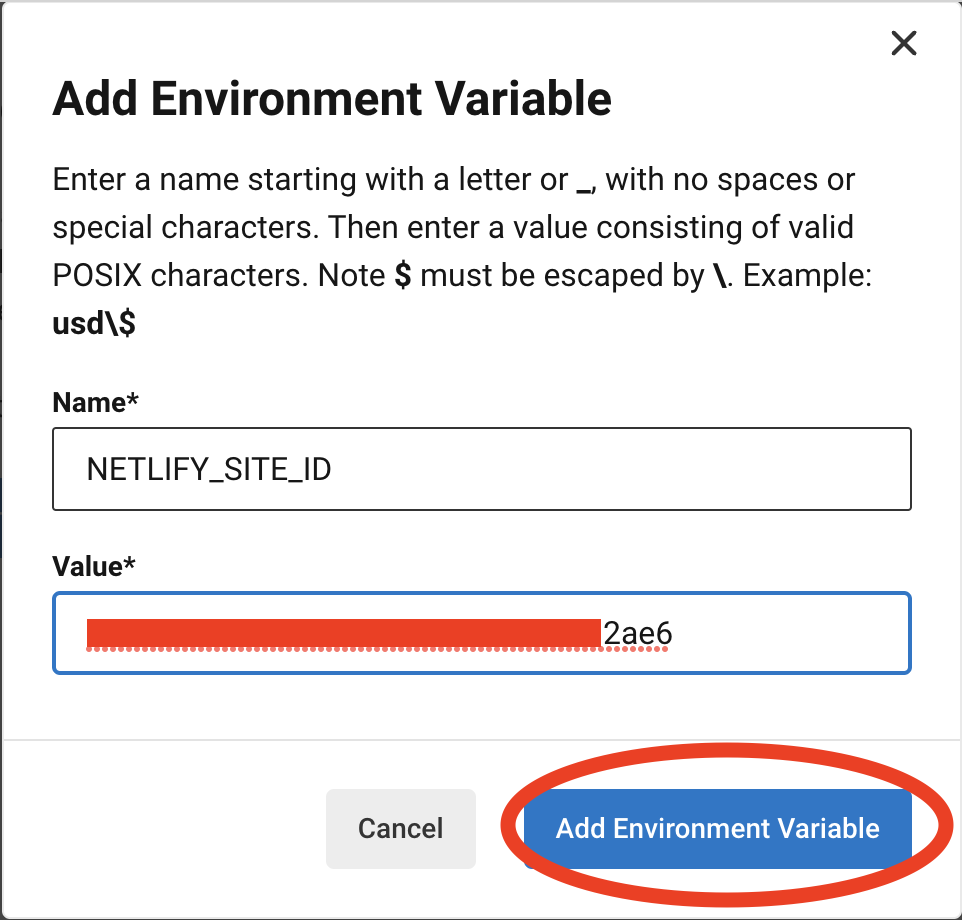
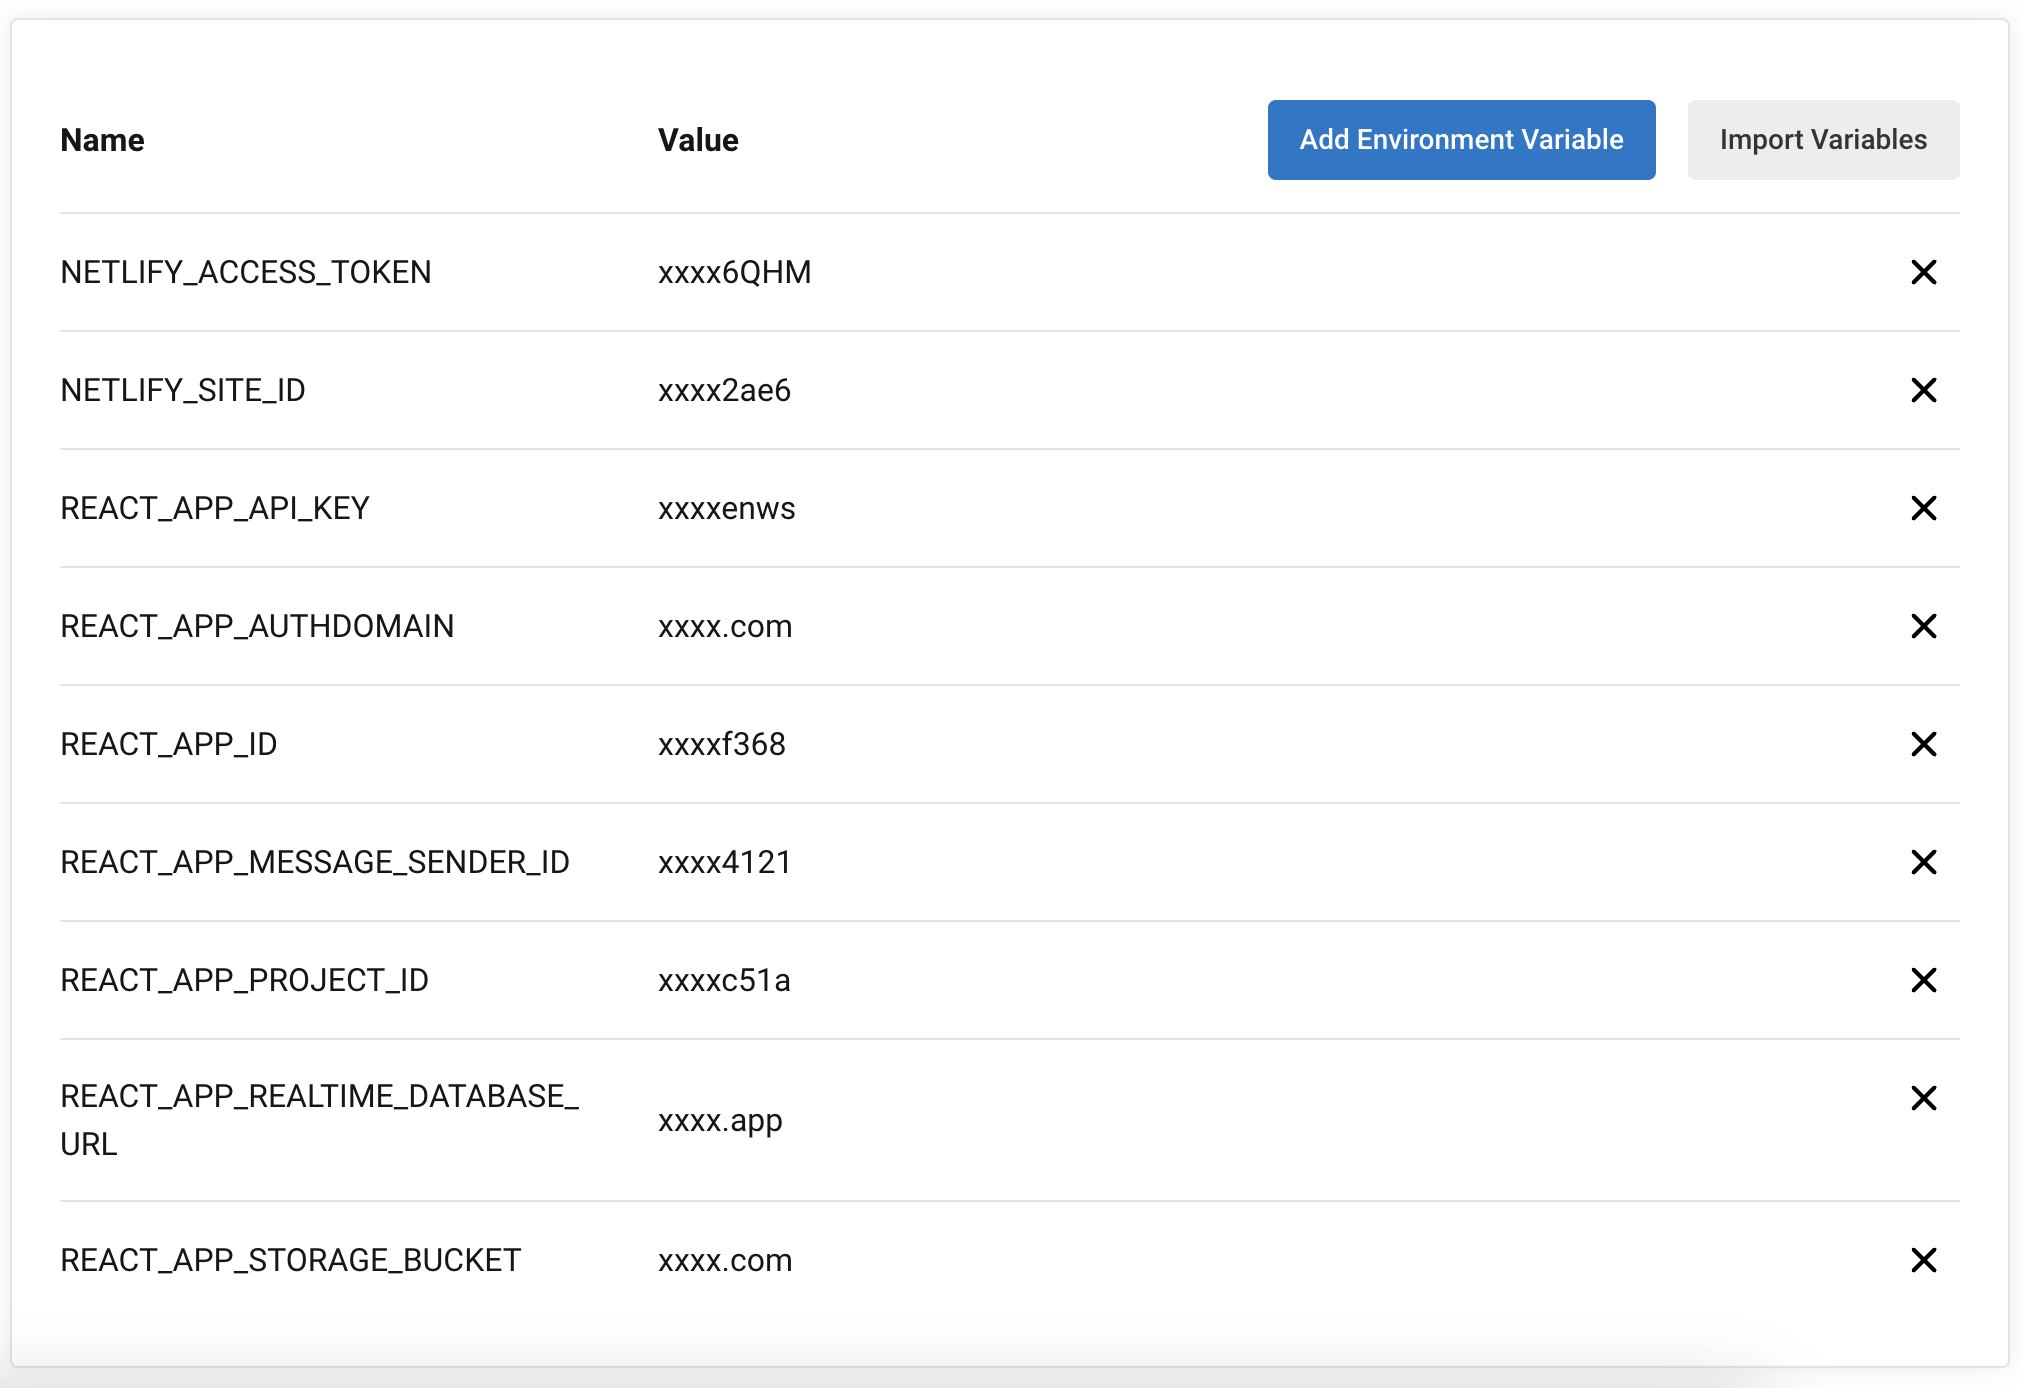
At this point you should be able to edit your code locally and push to the main branch. With this setup, we are building and deploying using CircleCI, CircleCI in turn leverages Netlify as a tool. Any push to the main branch will trigger the CircleCI workflow and a redeployment of the current code within the GitHub Repo.
Please goto the file Landing.js, please add the H1 statement. Add it within the rendered JSX.
Now push to the main branch, CircleCI should successfully deploy the changed code as below.
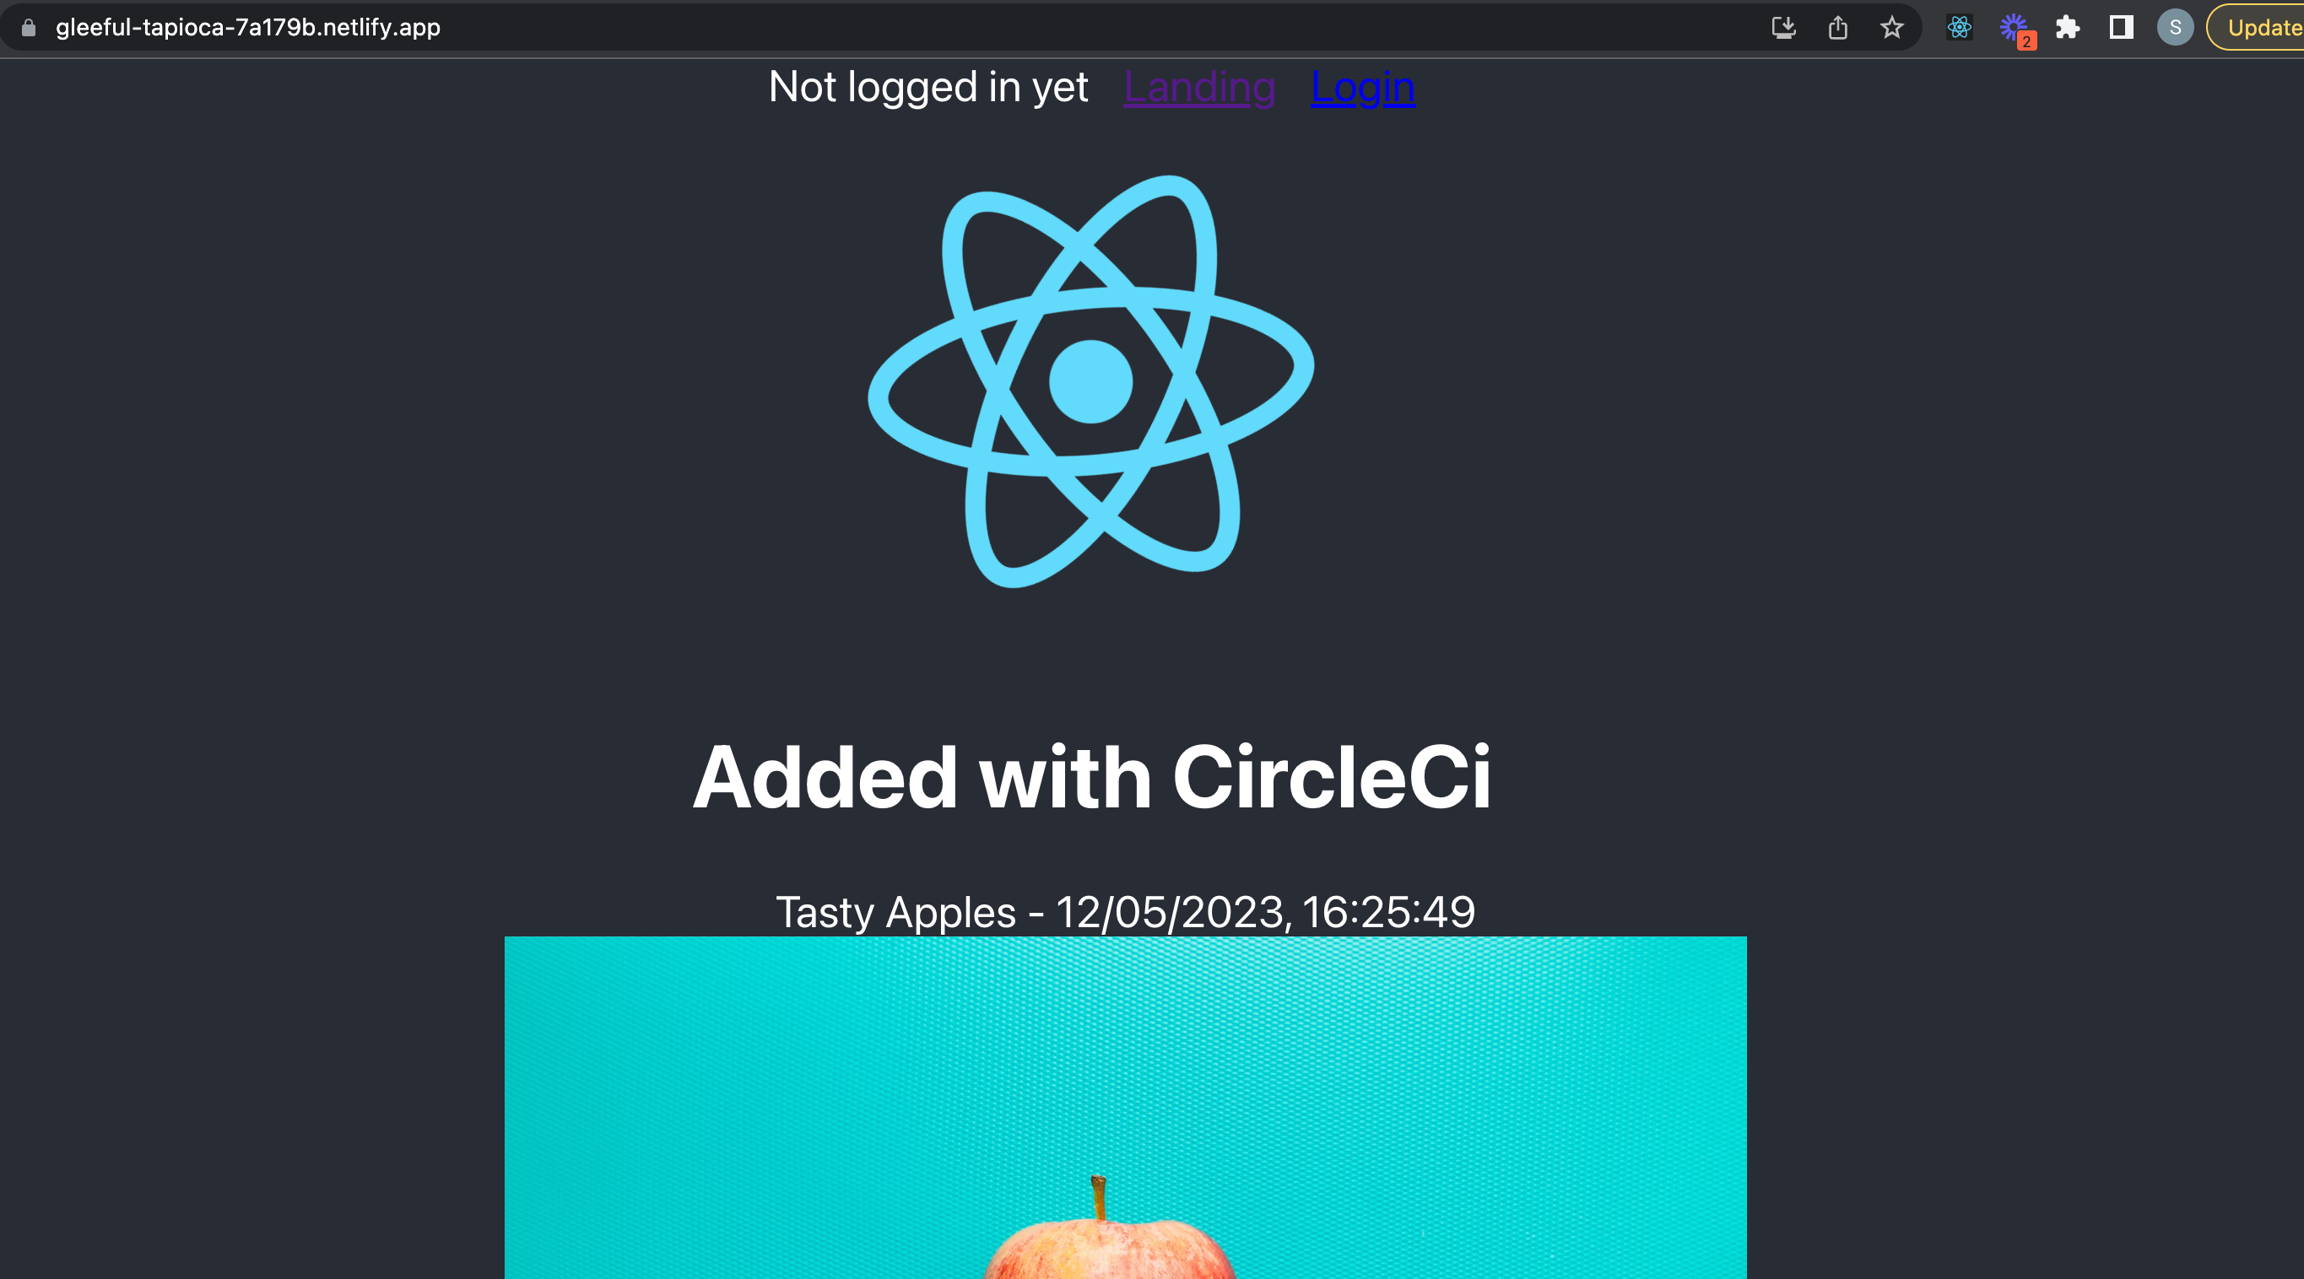
CircleCI is able to deploy due to the configuration file that we pushed into the main branch earlier. When we push to the main branch CircleCI clones the target branch (main), then all of the projects dependencies are installed and cached. CircleCI can then trigger the React command npm run build. Creating a production build within the build folder within the root of the project. This whole folder is then cached to be used later by CircleCI.
CircleCI then triggers the Netlify CLI, which deploys the new site using the $NETLIFY_SITE_ID as well as $NETLIFY_ACCESS_TOKEN, that we set within CircleCI. Only pushes to the main branch will trigger this work flow.
This is how you can develop a continuous deployment for your React frontend. If you alter the configuration file that we setup for CirleCI as well as implement tests into your application you would be able to run tests before it is deployed. By setting up CircleCI you are able to automate deployment and shorten your development processes by automating testing and deployment.
Last updated